Post-Processing Tutorial #1
So, a few posts back on my Flickr stream, I asked if there would be any interest in some lighting and/or post processing tutorials from Steven and I. I got a few comments on the picture itself and even more e-mails encouraging us to give it a go. I was happy to see such a positive response, so I decided to try it out on a shot from Friday night out in LA. I was out and about just shooting random pictures with 2 friends and I decided to use one of the shots for this tutorial.
Now, I do want to clarify that I am no way a photoshop master. I have learned what I know through my own trial and error, so if there is anything that you would do differently, I understand. I have never taken a class or anything on the subject, just my own experiences with the program. I know there's more than way to skin a cat, so with that said, let's begin.
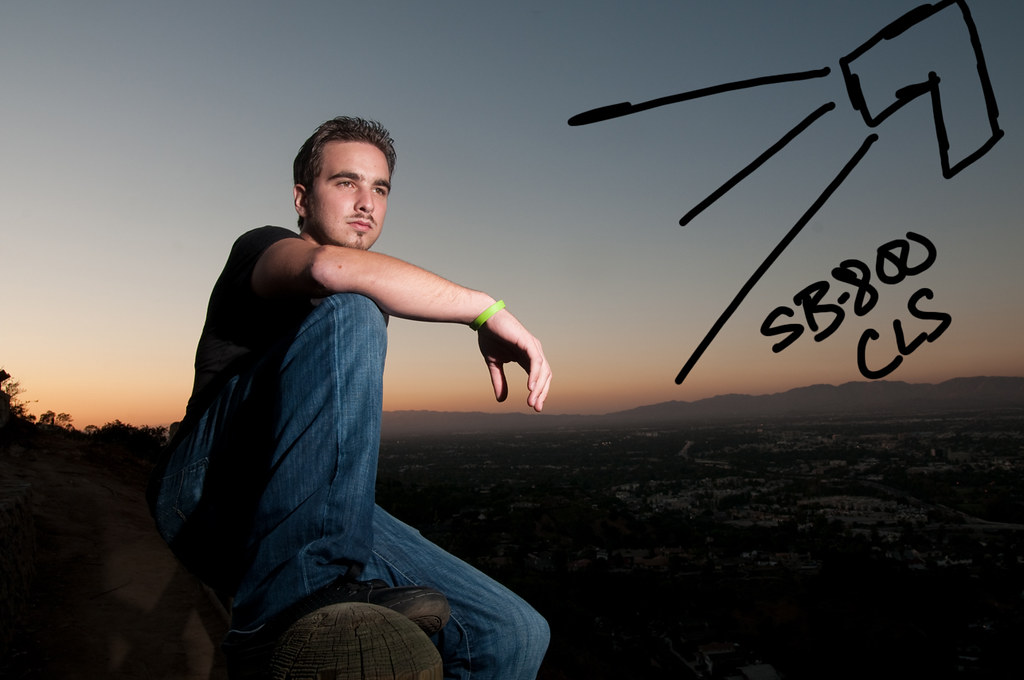
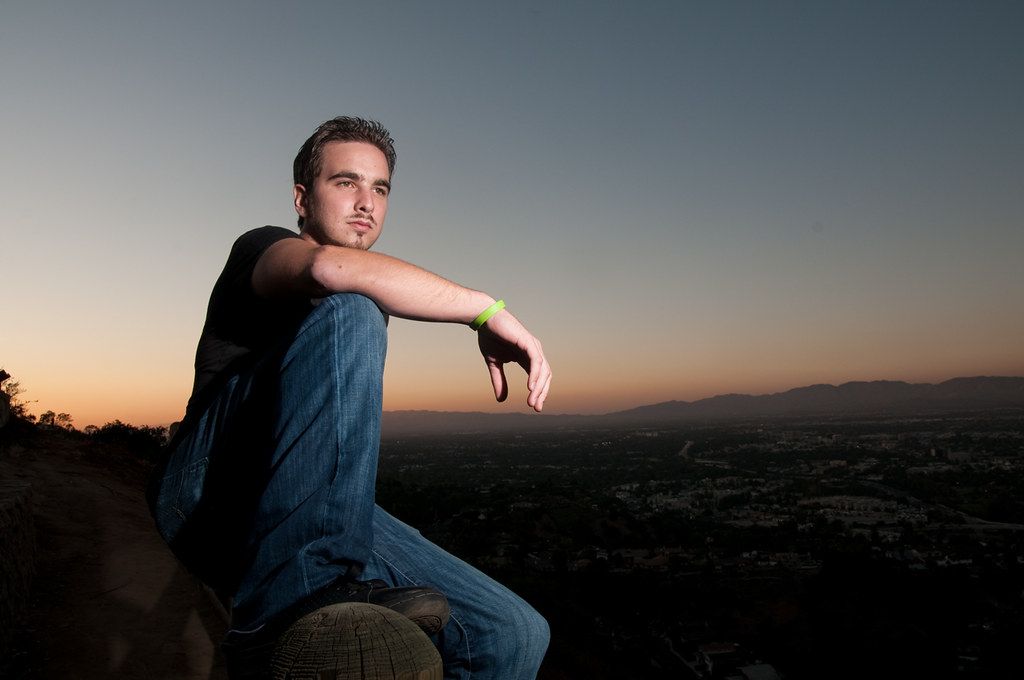
I knew I wanted to light up the subject with some hard light, so I used a bare Nikon SB800. I did not want to go through the hassle of plugging in a trigger, so I used Nikon's amazing CLS/AWL system. I must say I love having this at my disposal anytime I want. It is a great system that works well in mostly any situation, Canon just sucks in this department. Anyways, I had a VAL (voice-activated lightstand AKA. friend) holding the SB800 up and to the right of the subject in the picture we will be using.
As you can see, he is lit well and so is the mountain range, however the foreground is not. I was not too concerned with this, since I knew I could bring it back in post. This was a really quick run n' gun shot, as we stopped on the side of a road. I had the SB800 on TTL +1 EV value, if I recall correctly. I also used, the Tokina 12-24mm f/4 lens, I love this piece of glass and it is super sharp. I composed from a lower POV as I did not want my horizon running through the middle of his head, and to make him a little more powerful and bigger.
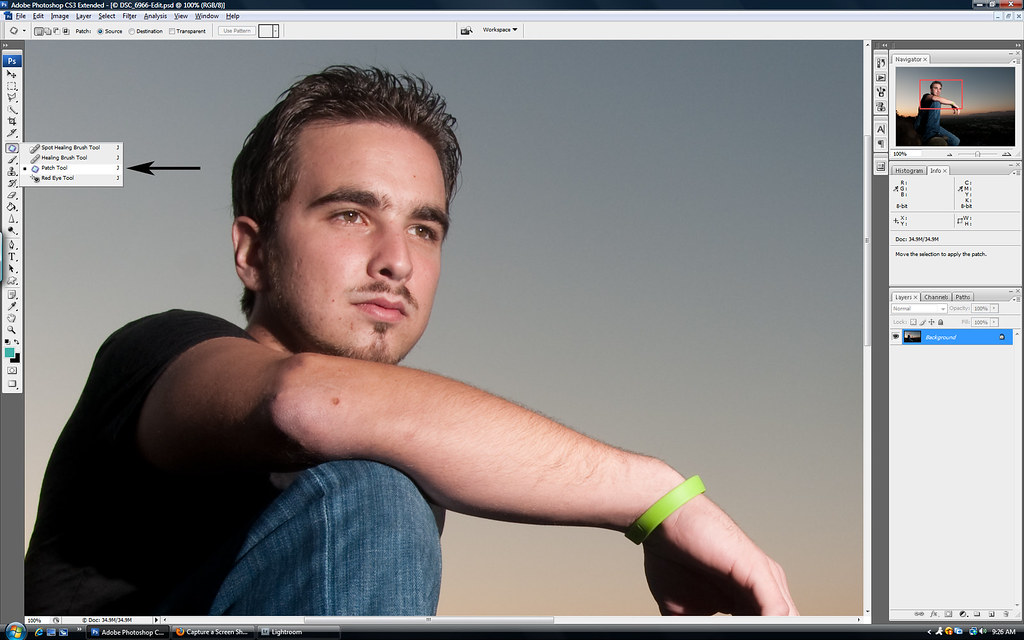
So, now we begin the post-processing part of the tutorial which I hope is easy to understand. The very first thing I did was open up the photo in photoshop:
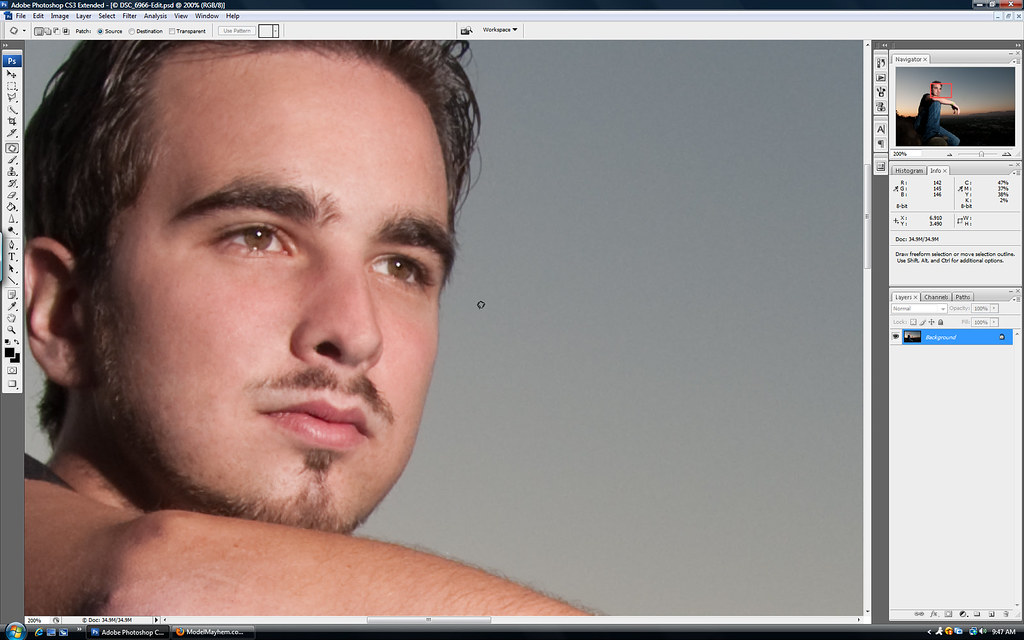
The very first step I take in photoshop is to clean up ALL the skin blemishes that I see and don't care for. I use the "patch tool" for this, as I find it is quicker and more natural IMO.
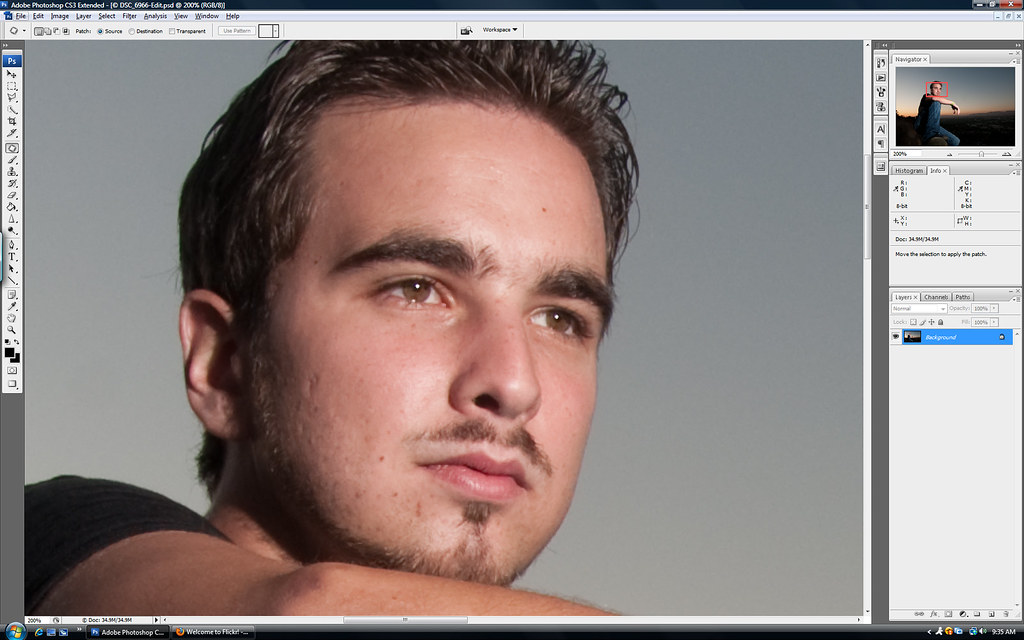
This is the close-up of the face BEFORE I remove any blemishes:
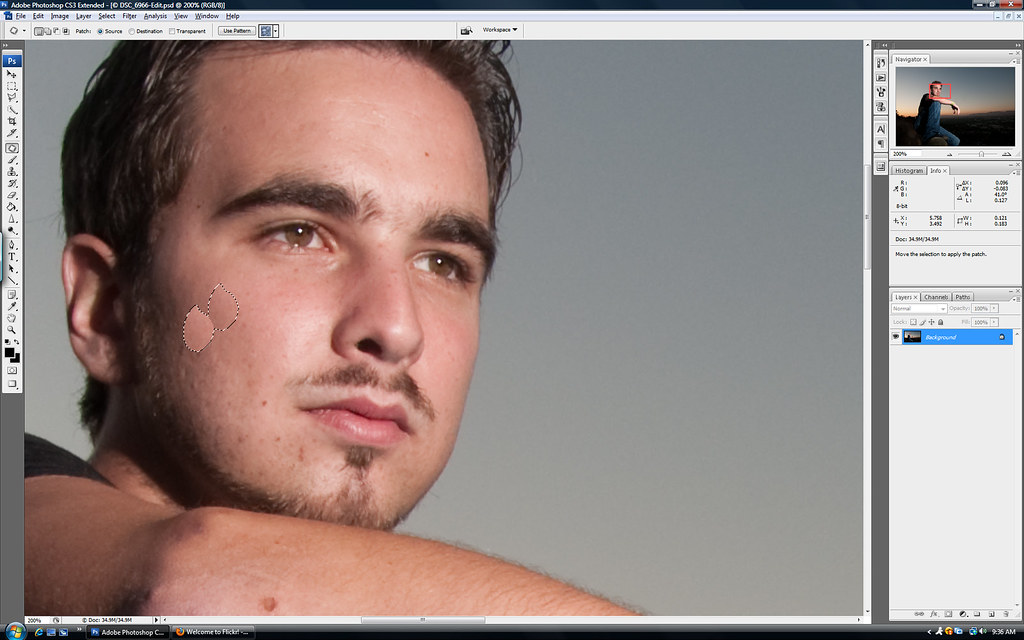
Once I select the "patch tool", I make sure that on the top tool bar I have "Source" selected, this allows me to drag my blemish to a clean source and photoshop will clone from that source. I simply then begin to circle the blemishes and drag them to a clean area of skin, and voila instant zit removal! Now this is VERY IMPORTANT, make sure the area you are sourcing from is the SAME texture as the area you are cleaning up!!!
Like this:
This is what the pic will look like after I have removed all the skin blemishes that I wanted to get rid of:
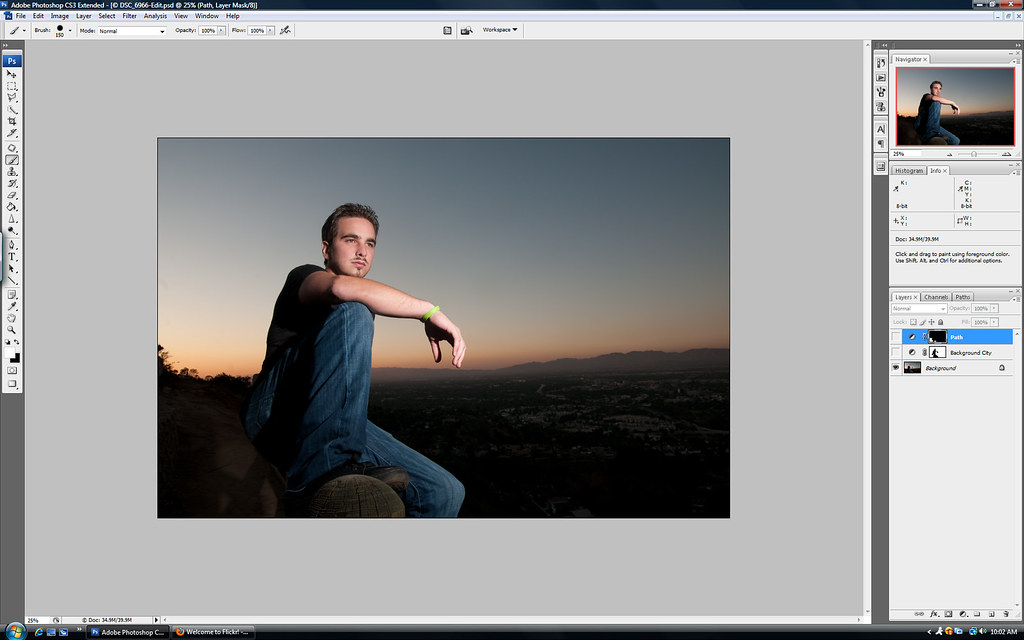
The next thing I begin to work on is bringing up the "exposure" so to speak, on the sky and city down below and the path to the left. I do this by doing 2 "curves" adjustment layers, 1 for the path and another for the city and sky.
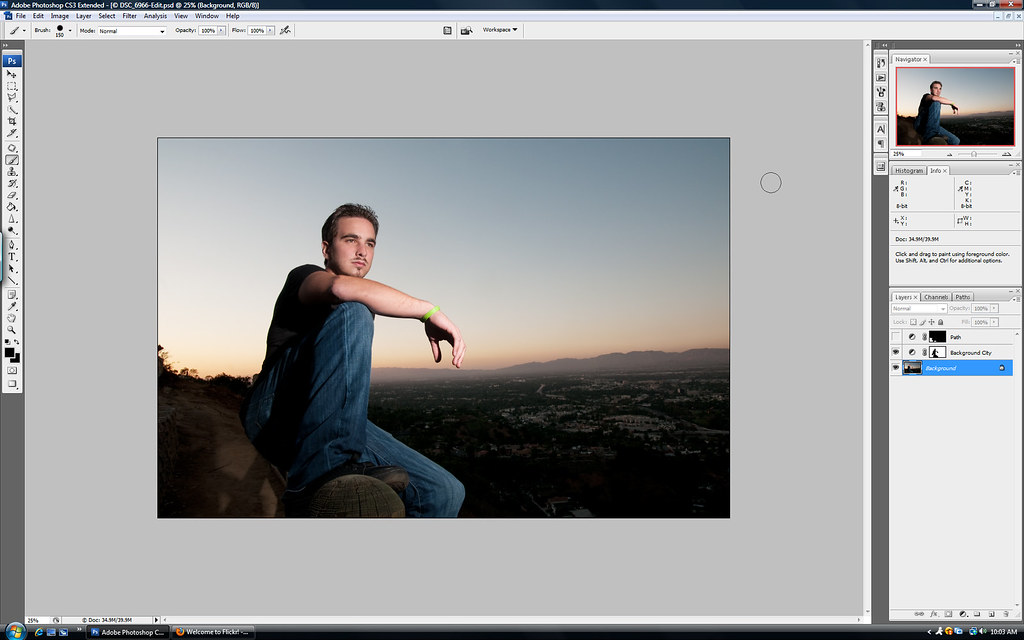
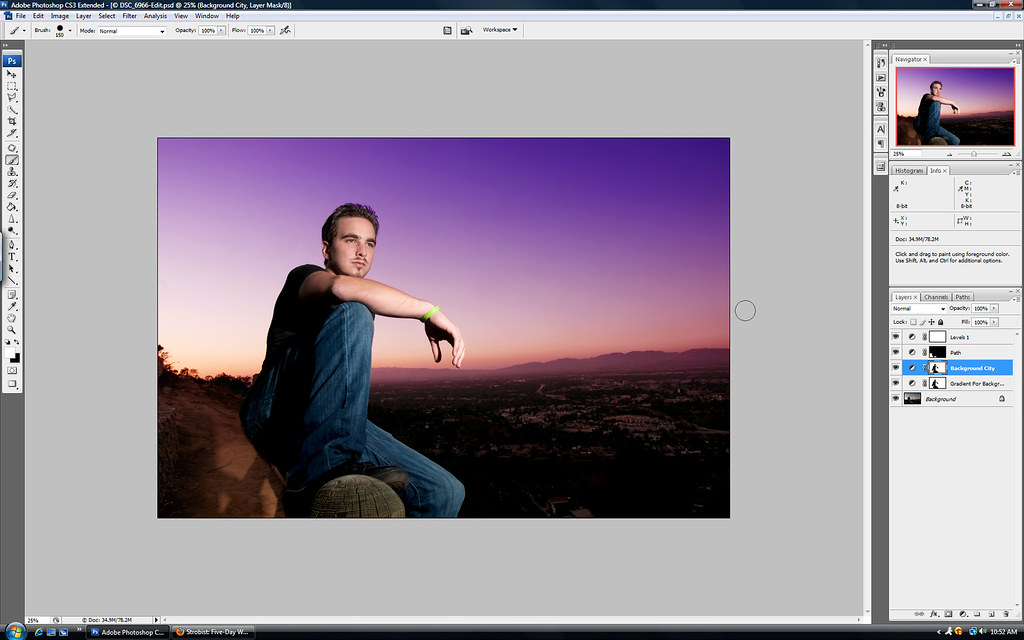
As you can see in the following picture, I have brought up the "curves" adjustment layer for the on layer "Background City" and masked out the path and the subject. This allows that adjustment layer to only affect the sky and city.
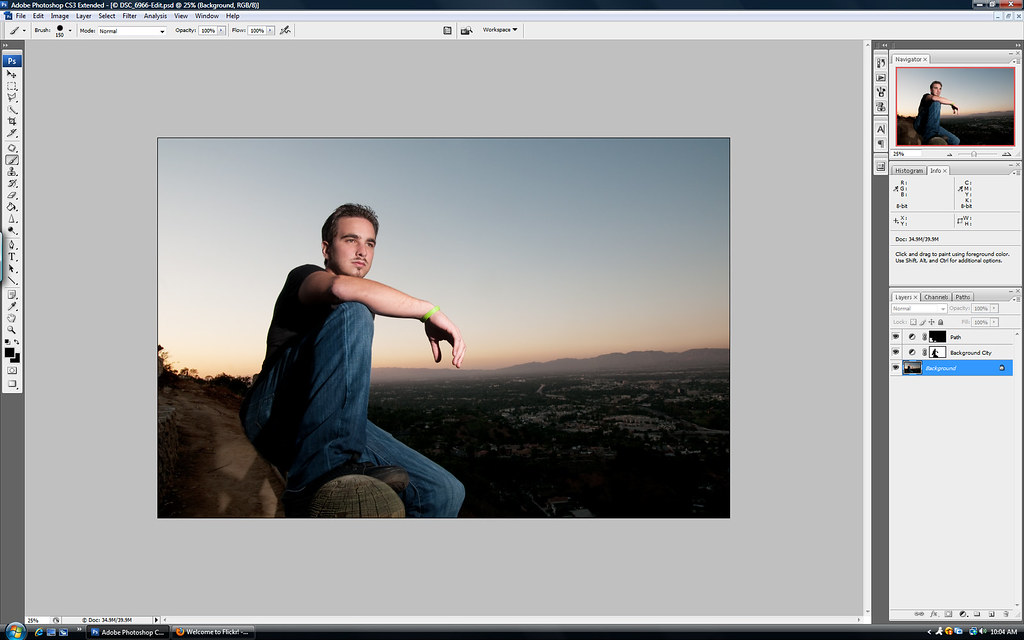
I then repeat the step with the 2nd "curves" adjustment on the "Path" layer. Now, I brought up the curve higher on this layer as it has to be brighter than the city, since it is in our foreground. I also do a layer mask for the entire image, except for the path. Which makes our picture look like this now:
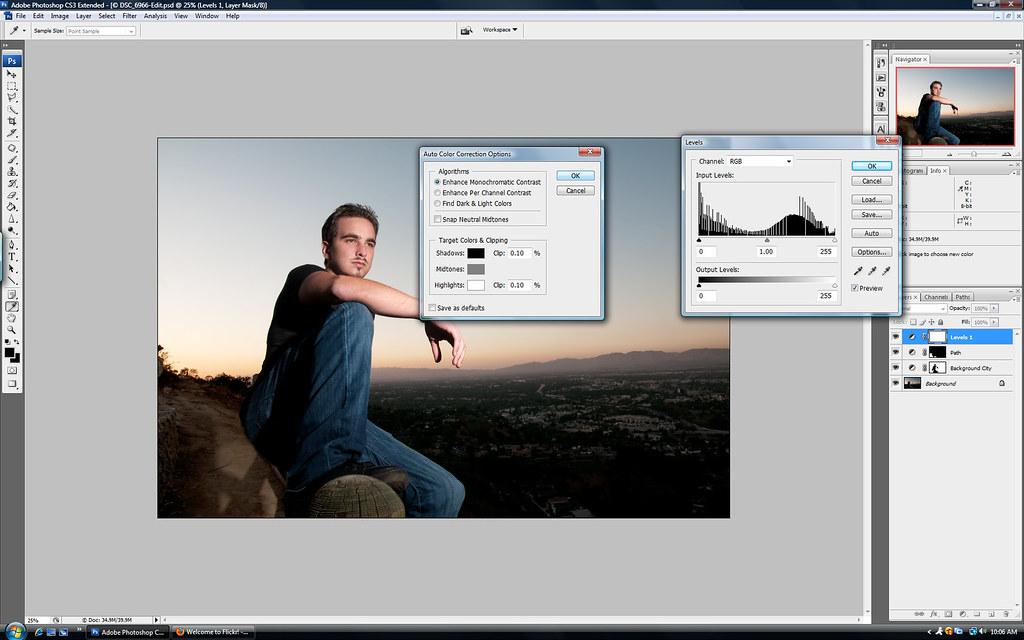
After this step, I then add another adjustment layer, but this time I use "levels". I then click on options, which brings up another window. I then click on "Enhance Monochromatic Contrast", click OK. I then adjust my levels to 11, 1.10, 255 and click ok.
My layers palette looks like this after doing all the steps mentioned above:
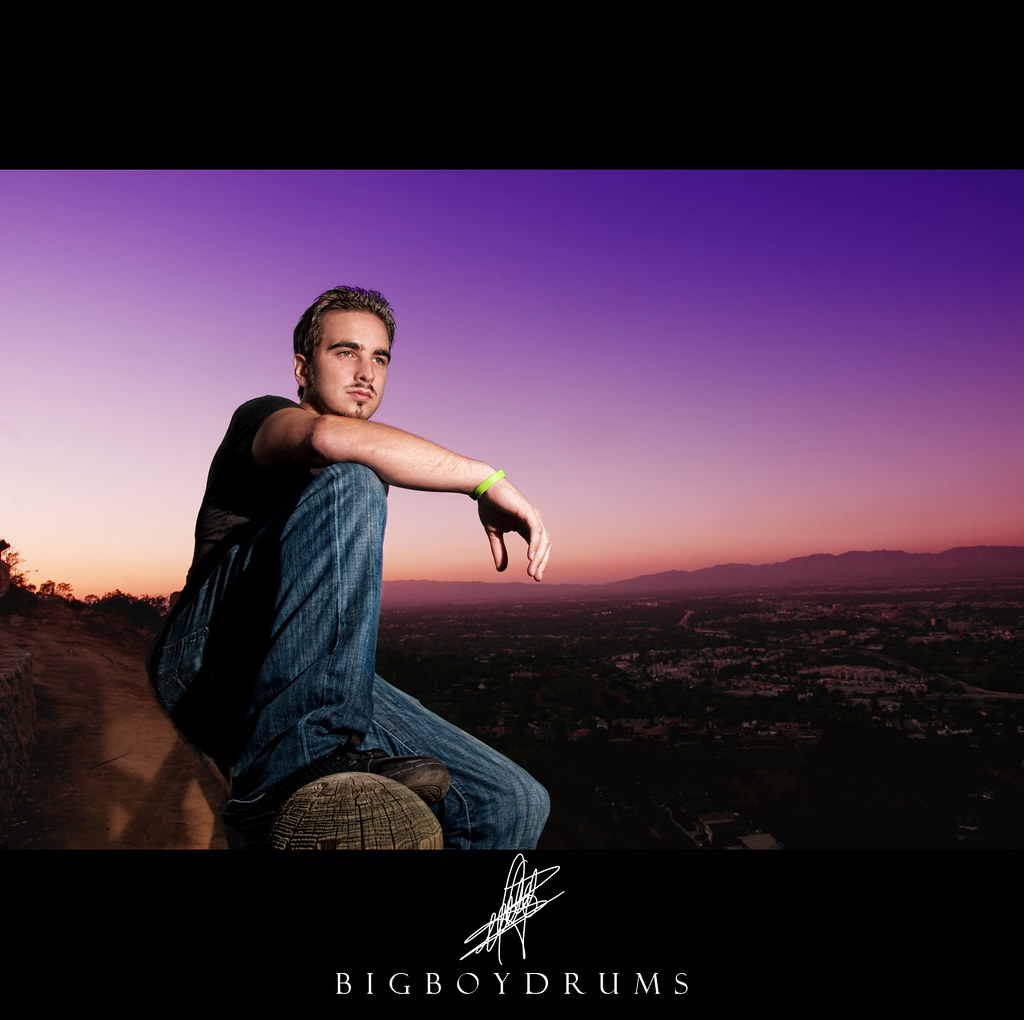
Now, I did this next step to add some color and drama to the picture. The sky was looking just too plain for me and the colors were not what all that appealing to me. So I added another adjustment layer this time using a "gradient map" layer. I played around with the colors till I got the ones I wanted, and changed the "Blending" mode to "Color". I then proceeded to do another layer mask this time letting the gradient affect everything but the subject. I also adjusted the opacity of the adjustment layer until it gave me the desired effect and saturation I was after. which made my picture look like this:
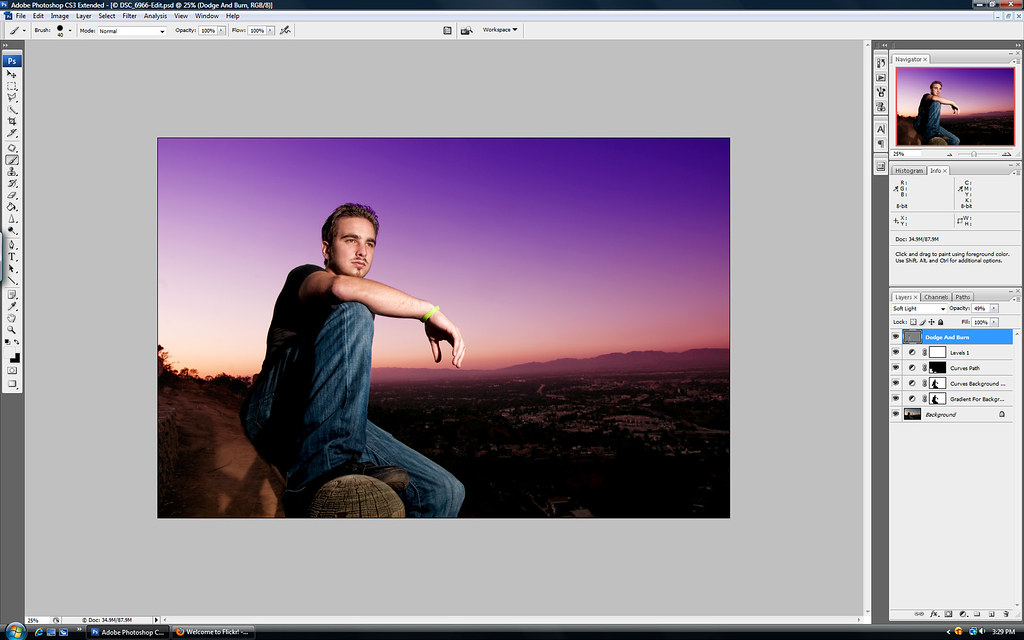
The next thing that I did was begin some "Dodging and Burning" to enhance both my shadows and highlights in the shot. I do this by adding a new layer and filling it with 50% grey and once again changing the "Blending" mode to "Soft Light". Once I do this I use a low opacity brush (about 10%) with a medium- soft edge (about 75%) begin to dodge and burn. I use a "white" brush on the highlights and a "black" brush on the shadows I want to enhance. Salt to taste on this step! This is what the shot looks like after some "Dodging and Burning":
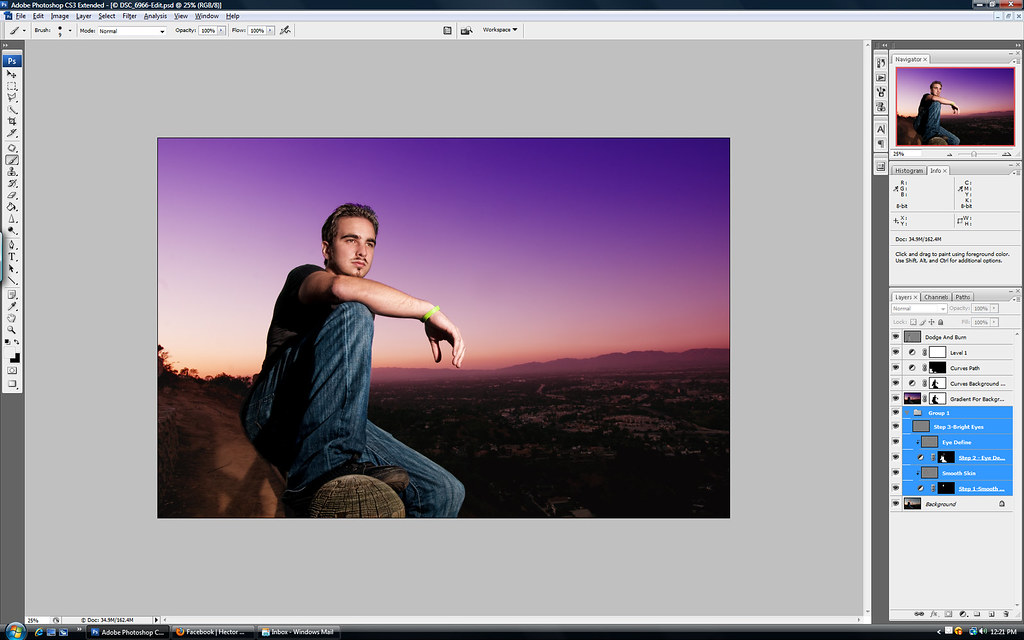
This final step is the ONLY action that I ever use on any of my work, and I recommend it highly as it is great at what it does. I use the Coffeeshop Powder Room Action, it is a really good and simple to use action. I click on the "locked" background layer then run the action. In this step you can play around a lot, you can sharpen the eyes, smooth skin, add a vignette, etc. I then put those layers into a Group so I can keep them organized in my layers palette. Play around here and you will find you can get a lot of variation of looks by using this action. This is what my "Layers Palette" looks like after I run the action and group them and make my adjustments using "layer masks" again:
Which of course, once I am done doing everything above makes my final picture go from this:
To my END RESULT:
I, Hope that this tutorial was easy to follow and that you all enjoyed it. It was a lot of work doing this, but it was very satisfying and a lot of fun. I am hoping that this will help out some of you that are just beginning with retouching. I enjoy retouching my photos as much as I enjoy shooting them, and I always take a picture with post-processing in mind. Please leave a comment telling me what you liked or disliked about this tutorial, and be nice, this is my first time ever putting something together like this!
Thanks,
Hector
P.S. Follow us on Twitter and Facebook...links in Linkbar section!
